Recovering and Migrating Prism Central with PCBR
Overview
There is a particular kind of quiet that settles in when Prism Central is down and you are the one who has to bring it back. This is the post I want you to have open when that happens. In part one I covered what Prism Central Backup and Restore (PCBR) protects and how to configure continuous and point-in-time backups. That was back in July, and part of what delayed this post was a round of hardware failures in my own lab, which is a fitting way to earn the right to write about recovering from failure. This part assumes your backups are in place and walks through the other side of it: restoring a Prism Central instance from a backup, the checklist that finishes the job, and using the same process to migrate an instance from one cluster to another on purpose - maybe migrating to a net new cluster. Restore and migration follow essentially the same steps. A migration is a restore with a little preparation up front, so once you know one, you know the other.
The goal is a procedure you can follow under pressure rather than a concept you have to reason through at 2 AM. If you have not set up backups yet, start with part one, because none of what follows works without a backup to restore from.
The Environment for This Walkthrough
To keep the steps concrete, here is the lab I am running these procedures against. Two clusters are enough to show a full cluster-to-cluster migration:
- Four-node NX-1065 cluster running AHV (NTNXCL2). The source. This is where Prism Central lives today.
- Three-node Cisco UCS C240 cluster running AHV (NTNXCL1). The destination, and the cluster the instance gets restored onto.
Both clusters are registered to Prism Central and configured as continuous backup targets. The walkthrough follows Prism Central as it moves from the NX-1065 to the UCS cluster. The lab runs AHV on both, but the procedures in this post apply equally to Nutanix clusters running ESXi. Each cluster also has three or more nodes, so the PCKMS encryption keys are recovered automatically in this lab. If your backup cluster has one or two nodes, the manual key steps later in this post apply to you.
Before You Begin
Restore is driven from Prism Element, not from the Prism Central instance you are recovering, which makes sense because the instance you are restoring is typically down. The entry point for every restore path below is the same:
- Log in to a Prism Element web console registered to the instance. On the home screen, the Prism Central widget shows the instance as Disconnected with a Restore Now link. Click Restore Now, which takes you to Settings > Restore Prism Central under Data Resiliency.
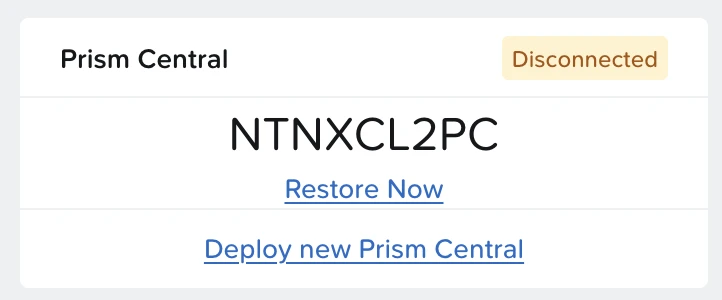
Prism Central widget in Prism Element showing a disconnected instance with a Restore Now link - On the Restore Prism Central page, choose between Restore Prism Central from Continuous Backups and Restore a Prism Central from Point-in-Time Backups. The sections below pick up from that choice.
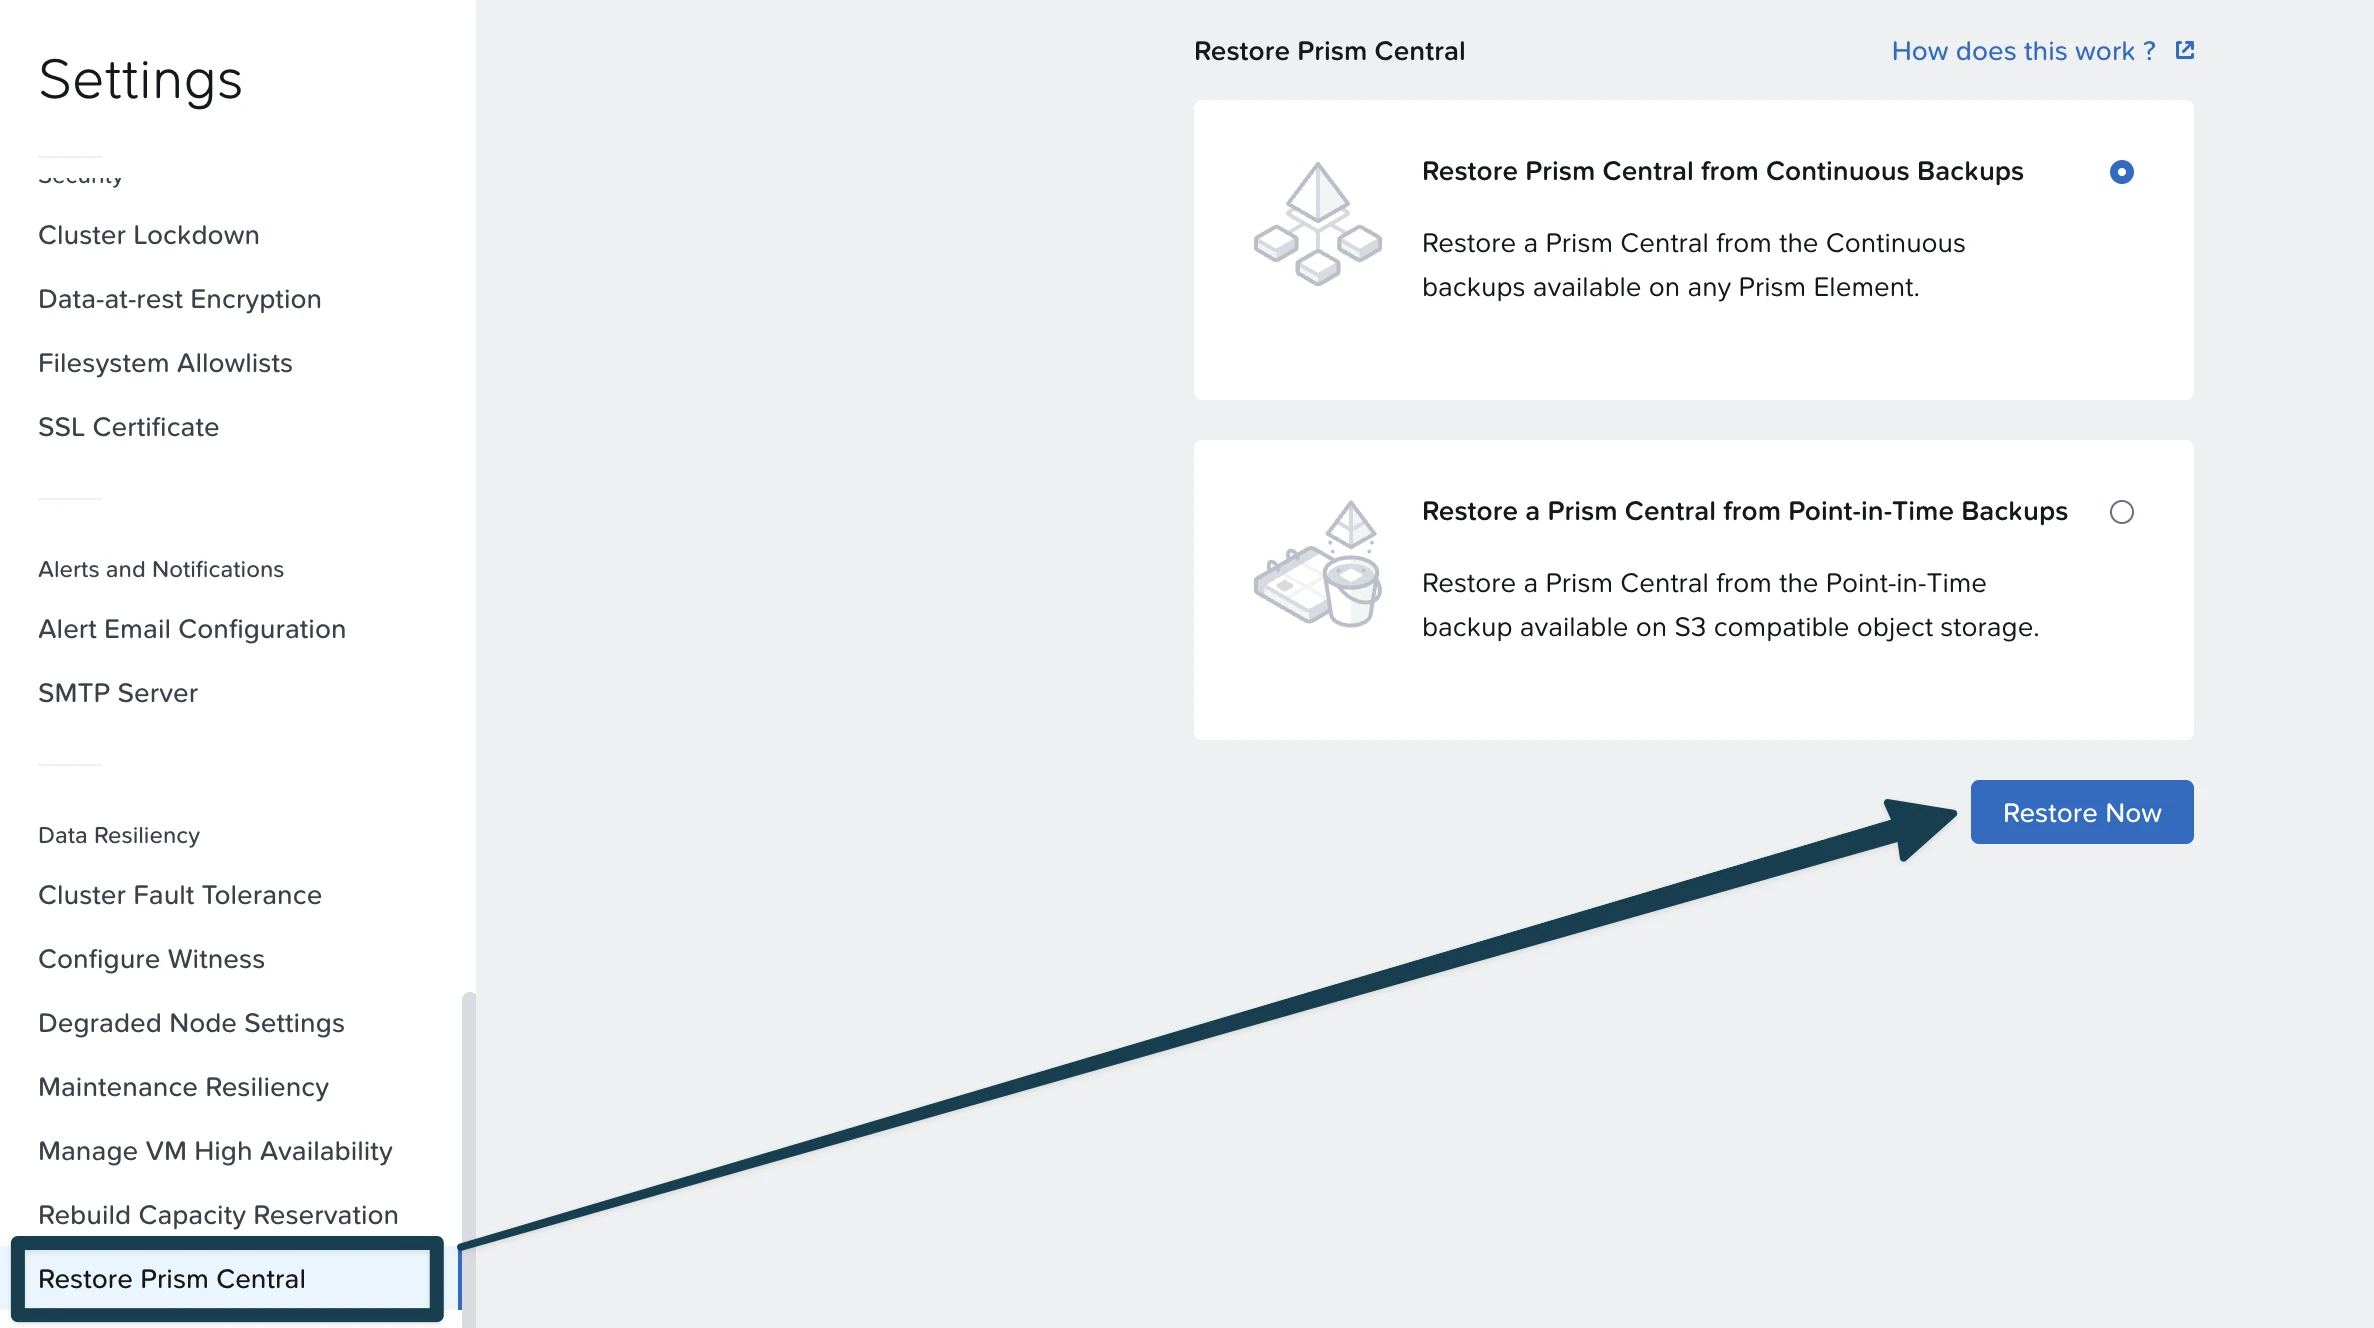
Restore Prism Central page in Prism Element with continuous and point-in-time restore options
Items of Note
A few things to have straight before you click anything:
- Confirm PCBR applies to your environment. PCBR is not supported when Prism Central runs in a non-Nutanix environment. If your instance is installed on non-Nutanix ESXi, for example a three-tier vSphere-based cluster, Prism Central does not support Prism Central Backup and Restore, Nutanix Disaster Recovery, or several other portfolio services. On that footprint, neither backup, restore, nor migration through PCBR is an option, so you need a different recovery strategy entirely.
- Validate the backup status. In the Prism Central web console, open the Infrastructure application, click the Settings icon, and navigate to General > Prism Central Backups. Under Continuous Backup, confirm that every cluster you back up to is listed and shows a recent Last synced time. Continuous backup syncs every 30 minutes, so an older timestamp means the backup is not current, and a restore only brings back what the latest sync captured. This check needs a running Prism Central, so for a planned migration you do it right before you start. For an unplanned outage, it is a check to build into routine operations, because you cannot run it once the instance is down.
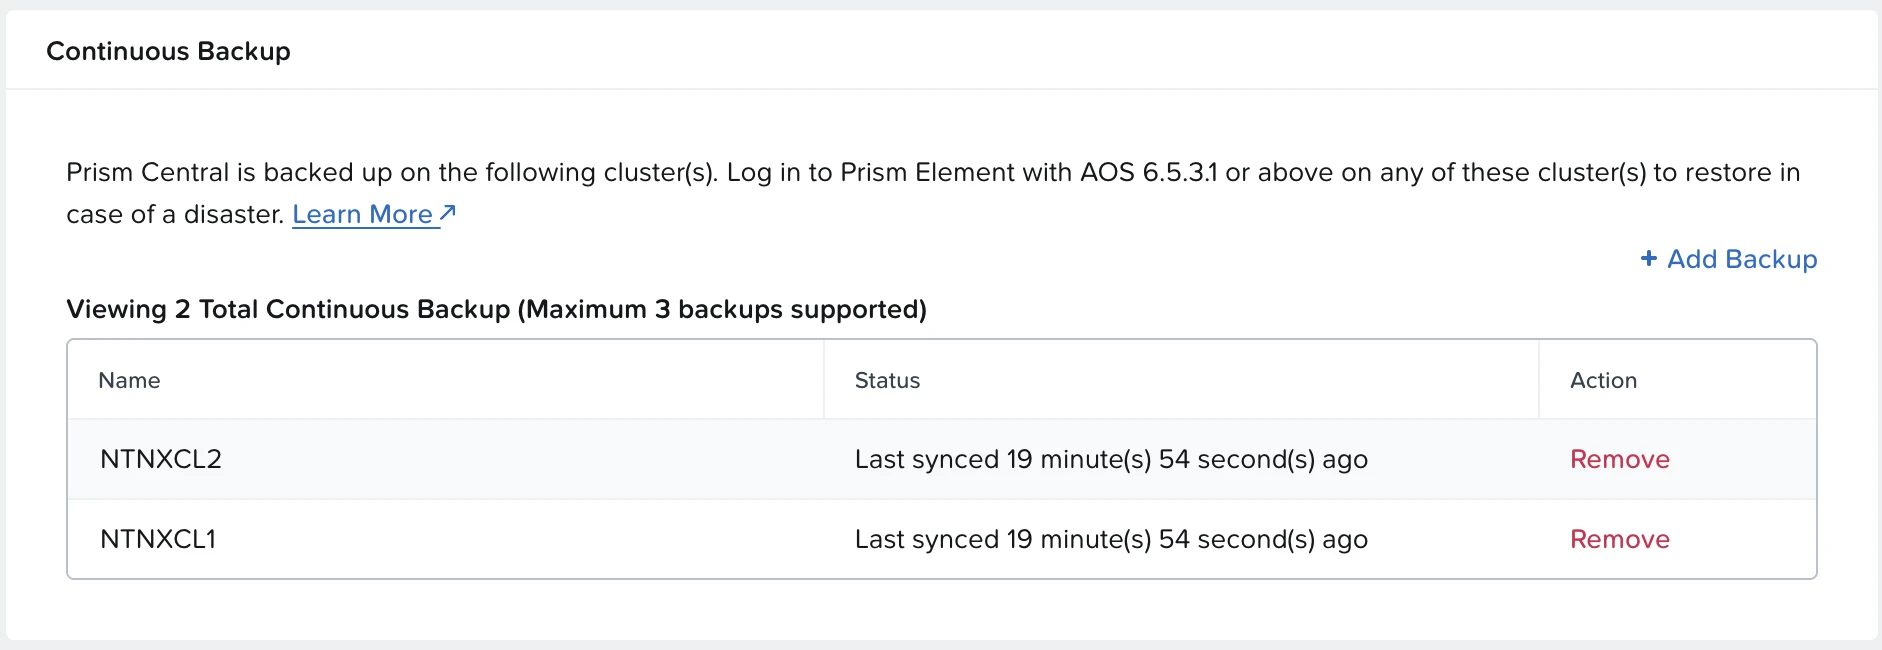
Continuous Backup status showing NTNXCL1 and NTNXCL2 recently synced - Free up the IP addresses. The addresses used to restore the instance must be free and available. If you use IP Address Management (IPAM), explicitly release the addresses assigned to the old Prism Central VMs.
- Power off the old instance for point-in-time restores. The restore creates a new instance that replaces the old one, so the old Prism Central must be disconnected and powered off first. Initiate the restore from only one Prism Element.
- Migrate OVA, template, and image data if clusters were unregistered. If you are restoring while retaining all registered Prism Element clusters, that data is backed up automatically. If the instance had clusters that were unregistered or decommissioned, migrate the OVA, template, and VM image data first, using the scripts in Nutanix KB-20493, KB-20494, and KB-20495.
Encryption Keys on Small Clusters
There is one detail that will stop a recovery cold if you skip it ahead of time, which is why it sits here, before the restore steps rather than after them. For backup clusters with three or more nodes, the system recovers PCKMS secret keys automatically. For clusters with one or two nodes, it does not, so you must back up the keys before you ever run PCBR. Run this on the Prism Central instance to write the keys to a text file:
1ncli> data-at-rest-encryption backup-software-encryption-keys file-path=/path/textfile.txt password=<password>
Store that file somewhere that will survive the loss of Prism Central, because a backup sitting on the instance you are recovering does you no good. After a restore on a small cluster, copy the file to the new instance and restore the keys from the Prism Central VM shell:
1nutanix@pcvm$ mantle_recovery_util -backup_file_path /path/textfile.txt -password <password>
To list the keys stored in the file before restoring, use the same tool with -list_key_ids:
1nutanix@pcvm$ mantle_recovery_util -backup_file_path /path/textfile.txt -list_key_ids -password <password>
Restoring from Continuous Backup
Continuous backup restores onto a registered AHV or ESXi cluster, and only from the latest backup. From the Restore Prism Central page:
- Select Restore Prism Central from Continuous Backups and click Restore Now. If continuous backup is your only configuration, Restore Now is available only when Prism Central is disconnected. A Restore Prism Central dialog opens with a few things worth reading rather than clicking past. It confirms that every Prism Central configuration is restored except legacy Flow Network Security, metrics older than 90 days, NCM Self-Service, Power Monitor, and Cisco Device Connector. It also reminds you that the old instance must be disconnected and not running, that previously registered Prism Element clusters re-register automatically after the restore, and that you should initiate the restore from only one Prism Element. Click Continue.
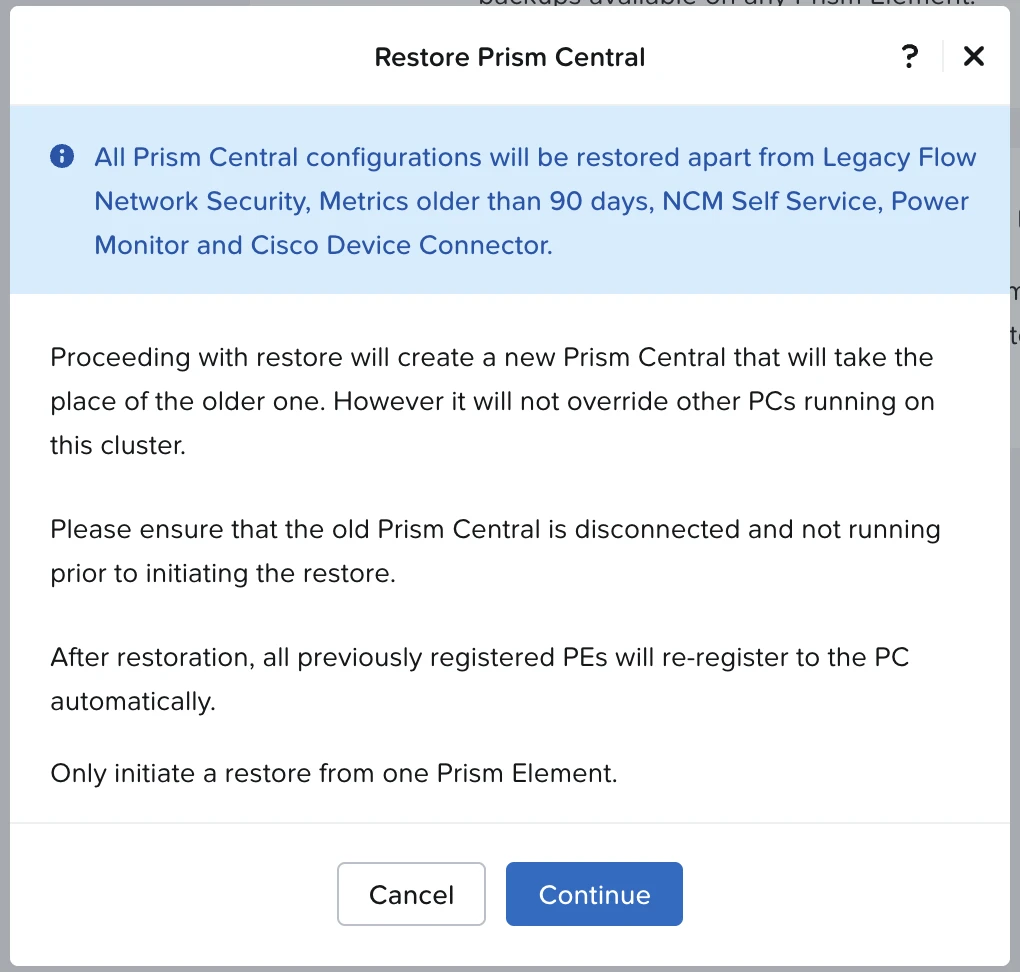
Restore Prism Central dialog listing the services that are not restored and the pre-restore reminders - Select the cluster where you plan to restore the instance. Depending on the continuous backup location, the current Prism Element instance or another Prism Element instance can be selected to restore the PC instance.
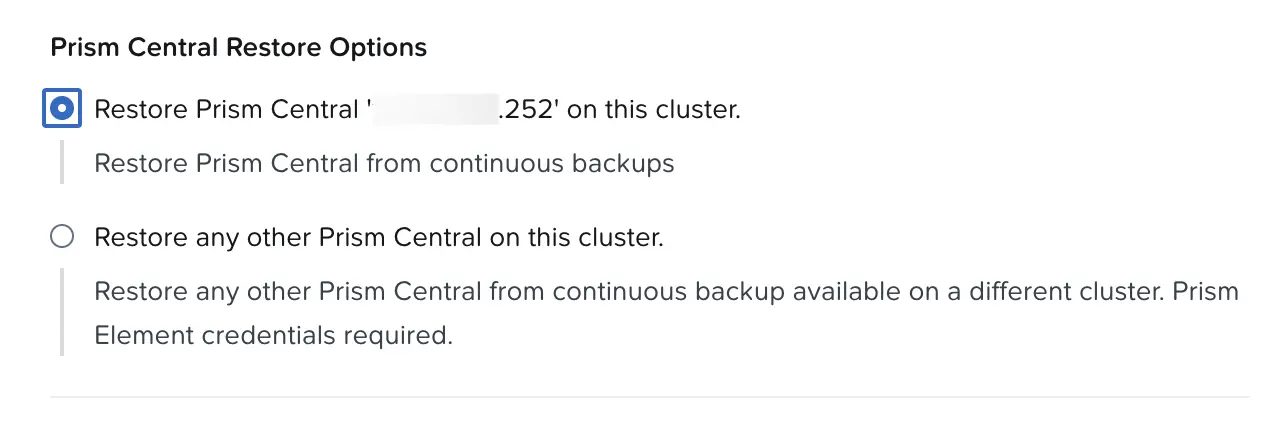
Selecting the destination cluster for the restored Prism Central instance - Select the Prism Central backup, which will be available from any of the Prism Element instances that contain the backup. In my case, I can select to restore from either cluster.
- Verify the version of the Prism Central instance to be used on that cluster. In my case, I was unable to have the process automatically download the software (not sure why, troubleshooting for another time), so my option was to manually upload the PC binary.
- Configure the network and general details for the restored instance, then click Save. Select the network first. If it is a Nutanix IPAM managed network, the Subnet Mask, Gateway, and DNS fields populate automatically. Otherwise, you fill them in manually. Under General Details, you can also change the VM name and IP address of the restored instance.
Tip: It is not obvious at first, because the VM Name and IP Address fields appear greyed out. Click the Edit link to unlock them, and make sure you click Save once you have made your changes.
This is where some of the magic happens. Prism Central runs many of its services on the Microservices Platform (MSP), and that architecture makes changing the IP address of an existing instance anything but an easy activity. The restore sidesteps that problem completely. The new instance comes up on whatever network and IP address you enter here, so a PCBR migration doubles as a clean way to re-IP Prism Central. Life is easier! Just remember to update any DNS records and firewall rules that point at the old address.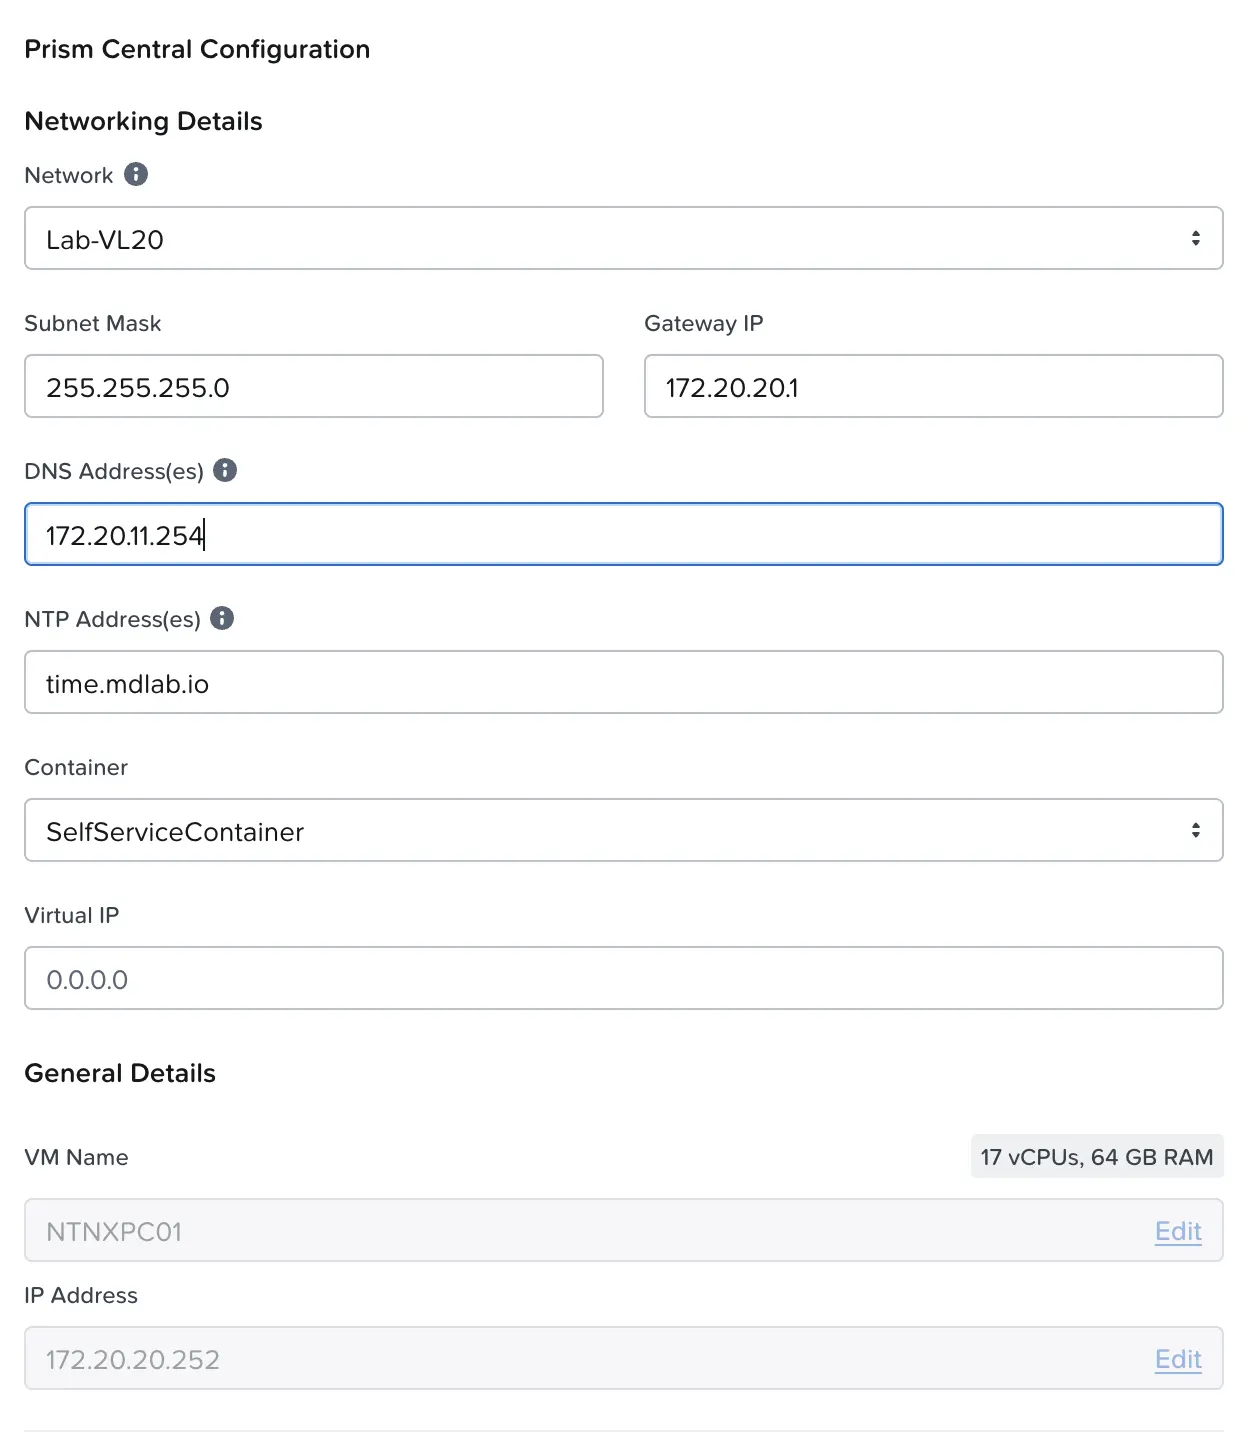
Network, name, and IP address settings for the restored instance - Review the summary and click Recover.
Restoring from Point-in-Time Backup
My lab migration uses continuous backup, so treat this section as a reference for when you need to restore from an object store instead. Point-in-time restore pulls from your object store and can land on a registered or unregistered cluster that meets the requirements. The endpoint details differ by target (AWS S3, Nutanix Objects, or a generic S3-compliant store), but the wizard is otherwise the same. From the Restore Prism Central page:
- Select Restore a Prism Central from Point-in-Time Backups and click Restore Now, then click Continue.
- On the Connect step, choose the endpoint type and enter the connection details:
- AWS: region name, bucket name, and (for NC2 environments) access key and secret access key.
- Nutanix Objects: the public IP address or FQDN of the object store, bucket name, optional certificate, access key, and secret access key.
- Other S3-Compliant Object Store: IP address or host name, region name, bucket name, optional certificate, access key, and secret access key.
- On the Source step, select the Prism Central instance to restore. A single bucket can hold backups for multiple instances, listed as
PC_<IP_ADDRESS>or the FQDN if one was configured. - On the Restore Point step, pick the date and the specific restore point you want.
- On the Installation step, verify the original cluster and the version of the instance.
- On the Configuration step, set the network details: network, subnet mask, gateway IP, and DNS addresses. If you are restoring to the same cluster that hosted the instance, these fields populate automatically. Restoring to a different cluster or availability zone means entering them yourself.
- On the Summary step, review everything and click Restore.
What to Expect During a Restore
Whichever path you take, plan for time and resist the urge to poke at the instance while it comes up. Nutanix puts the instance restore at roughly 60 to 90 minutes, and depending on the size of the configuration data, the full deployment plus configuration restore can stretch to 120 minutes. After that, it takes another 30 to 40 minutes for all guest VMs, disks, and metrics to appear in the console. Do not perform any actions on the restored instance until every recovery task on the cluster has completed. You can watch the whole thing in the Tasks window.
The Post-Restoration Checklist
The restore is not finished when the instance boots. Work through these items before you call it done:
- Use only the new instance. If the old Prism Central comes back, shut it down or delete it, because running both can corrupt data. If a restore fails, contact Nutanix Support and do not bring the old instance back up.
- Accept the EULA again. The first time you log in to the restored instance, the Nutanix EULA and Terms of Use page appears, just like it does after a fresh installation. This happens after a standard restore and after a migration, so do not be surprised by it.
- Reset credentials. The instance restores with default credentials, so change them.
- Leave the Prism Element clusters alone. The registered clusters need no changes on your part. They re-register with the restored instance automatically and come back under Prism Central management on their own.
- Reconfigure proxy, FQDN, and cluster name. These do not always carry over. In particular, a custom cluster name might revert to Unnamed after a restore, so set it again.
- Reconfigure the S3 bucket credentials if you have both object storage and on-prem targets and you recovered through the on-prem cluster.
- Handle in-progress DR jobs. If the old instance had recovery plan jobs running, follow the steps in Nutanix KB-10962 to clear stuck failover tasks.
- Reconfigure LCM if you use a dark site or do not use the Nutanix portal.
- Restore encryption keys on small clusters. If your backup cluster has one or two nodes, restore the PCKMS keys from the file you exported, using the
mantle_recovery_utilsteps in Encryption Keys on Small Clusters.
Migrating Prism Central Between Clusters
The same PCBR machinery that recovers a failed instance can move a healthy one. This is useful when you are retiring hardware, consolidating clusters, or moving Prism Central to a new network. That last one is a bigger deal than it sounds. Because of the MSP architecture, changing the IP address of a running Prism Central is anything but easy, but a PCBR migration lets you pick a new network and IP address during the restore and handles the rest. The one hard rule is that live migrating the Prism Central VM is not supported. Only the PCBR restore process is. Both the current cluster and the destination cluster must also be registered to the instance.
The steps are essentially the same as a restore. The difference is the preparation at the front: you make sure the destination cluster holds a current backup, then shut down the healthy instance yourself instead of waiting for a failure to do it for you. From there, it is the same restore workflow covered above. In my lab, the current cluster is the NX-1065 and the destination is the UCS cluster:
- Configure the destination cluster as a backup location for the instance, and wait for the backup to complete. This can take a couple of hours. (This is the continuous backup setup covered in part one, pointed at the destination cluster.)
- Validate the backup status as described in Before You Begin, and confirm that the destination cluster shows a recent Last synced time. In my lab, that means checking NTNXCL1, the UCS cluster.
- SSH to the Prism Central instance as the nutanix user and stop it, typing
I agreewhen prompted:The instance takes 10 to 15 minutes to stop.1nutanix@pcvm$ cluster stop - Power off the instance.
- Log in to the Prism Element web console on the destination cluster and follow the steps in Restoring from Continuous Backup, selecting the destination cluster as the restore target.
Because migration uses the restore path, the same set of unsupported services applies. Anything on the unsupported list from part one will not come across, and the restore dialog in step 1 of the restore workflow repeats that list, so plan for it before you cut over.
The Gotchas, in One Place
Most of these are covered above, but they are easy to lose in the middle of a procedure. This is the short list I would read right before starting:
- Back up small-cluster keys first. On one- and two-node backup clusters, the PCKMS keys are not recovered automatically. If you did not export them before the failure, that step cannot be done after the fact.
- Continuous backup only restores the latest copy. If you need to roll back to an earlier state, you need a point-in-time backup in an object store.
- One restore, from one Prism Element. Kick off the restore from a single Prism Element and let it finish. The documentation is explicit about initiating from only one.
- The old instance stays down. Never bring the original Prism Central back online after a restore, and never after a failed one. Call Nutanix Support instead.
- IP addresses have to be free. Release them in IPAM before you start, or the restore has nowhere to land.
- Some settings do not come back. Plan to reset credentials and reapply the proxy, FQDN, cluster name, S3 credentials, and dark site LCM configuration.
- Migration is a restore, not a Live Migration. Live migrating the Prism Central VM is not supported, and the pre-migration backup to the destination can take a couple of hours, so build that into the change window.
- Non-Nutanix ESXi is out. If Prism Central runs on three-tier vSphere, PCBR is not an option at all.
Wrapping Up
A recovery is only calm when you have done the reading before you need it. If you have your backups configured from part one, and you keep this walkthrough and the encryption-key steps somewhere you can find them fast, bringing Prism Central back becomes a procedure with a predictable clock rather than an emergency. The same is true for migration: it is the restore path with an extra step at the front, and knowing that takes a lot of the mystery out of moving your management plane between clusters.
Have you run a PCBR restore or migration for real, or are you planning to move Prism Central onto new hardware or a new network? I'd love to hear what tripped you up, what went smoother than expected, and what you would tell someone doing it for the first time. Connect with me on LinkedIn or reach out at mike@mikedent.io.